画像の中心に十字線と円を描画する
文章で説明するのはすこし面倒ですので、下記の Fig. 1 と Fig. 2 でなんとなく雰囲気をつかんでください。XAML で Canvas を Transparent にしておくことがコツです。Fig. 1の Canvas と Image をぴったり重ね合わせたものが Fig. 2 です。

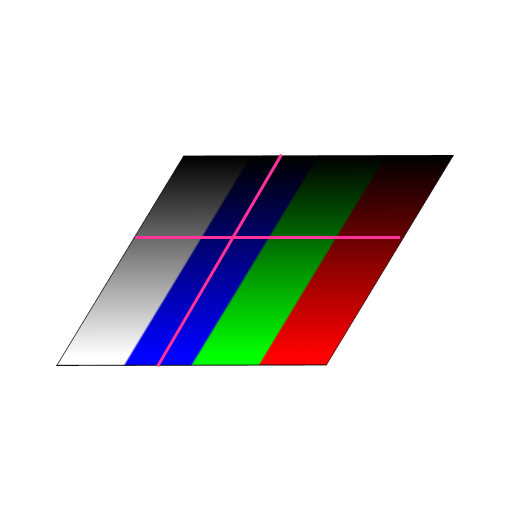
十字線は、水平線用の Line と、垂直線用の Line の2アイテムをあらかじめ XAML で定義しておき、その描画開始座標と描画終了座標をコードから指令してやることで実現します。その他の Ellipse や Polyline や Polygon などの描画要素についても同じ考え方です。
とりあえず最初のうちは「xaml で描画アイテムを必要数だけ用意して、xaml.cs から位置決めする」とワンパターンに覚えておけばいいでしょう。
たくさん Line を描画するので用意する本数が分からない場合は、コードで Line を動的に作成して Canvas に追加するという方法があります。これはまた別の機会で紹介します。
<Window x:Class="aaa.MainWindow"
        xmlns="http://schemas.microsoft.com/winfx/2006/xaml/presentation"
        xmlns:x="http://schemas.microsoft.com/winfx/2006/xaml"
        xmlns:d="http://schemas.microsoft.com/expression/blend/2008"
        xmlns:mc="http://schemas.openxmlformats.org/markup-compatibility/2006"
        xmlns:local="clr-namespace:aaa"
        mc:Ignorable="d"
        Title="MainWindow" Height="760" Width="780">

    <DockPanel>

        <Menu DockPanel.Dock="Top">

            <MenuItem x:Name="menuApplication" Header="Application">
                <MenuItem x:Name="menuApplicationQuit" Header="Quit" Click="menuApplicationQuit_Click"/>
            </MenuItem>

            <MenuItem x:Name="menuDebug" Header="Debug">
                <MenuItem x:Name="menuDebugExec000" Header="Exec000" Click="menuDebugExec000_Click" />
                <MenuItem x:Name="menuDebugExec001" Header="Exec001" Click="menuDebugExec001_Click" />
                <MenuItem x:Name="menuDebugExec002" Header="Exec002" Click="menuDebugExec002_Click" />
                <MenuItem x:Name="menuDebugExec003" Header="Exec003" Click="menuDebugExec003_Click" />
            </MenuItem>

        </Menu>

        <ToolBarTray DockPanel.Dock="Top">
            <ToolBar>
                <Button x:Name="tbnDebugExec000" Content="Exec000" Width ="48" Height="48" Click="menuDebugExec000_Click"></Button>
                <Button x:Name="tbnDebugExec001" Content="Exec001" Width ="48" Height="48" Click="menuDebugExec001_Click"></Button>
                <Button x:Name="tbnDebugExec002" Content="Exec002" Width ="48" Height="48" Click="menuDebugExec002_Click"></Button>
                <Button x:Name="tbnDebugExec003" Content="Exec003" Width ="48" Height="48" Click="menuDebugExec003_Click"></Button>
            </ToolBar>
        </ToolBarTray>

        <StatusBar DockPanel.Dock="Bottom" Height="30">
            <Label Name="stbLabel000"/>
            <Separator/>
            <Label Name="stbLabel001"/>
            <Separator/>
            <Label Name="stbLabel002"/>
            <Separator/>
            <Label Name="stbLabel003"/>
        </StatusBar>

        <Border BorderBrush="DarkViolet" BorderThickness="1" >
            <ScrollViewer Name="scv000" Background="DarkViolet" ScrollViewer.HorizontalScrollBarVisibility="Visible" ScrollViewer.VerticalScrollBarVisibility="Visible">
                <Grid x:Name="grid000">

                    <Image x:Name="image000" Stretch="Uniform"/>

                    <Canvas x:Name="canvas000" Background="Transparent">
                        <Line x:Name="cross_hair_horz" Stroke="Cyan" StrokeThickness="3" StrokeStartLineCap="Flat" StrokeEndLineCap="Flat"/>
                        <Line x:Name="cross_hair_vert" Stroke="Yellow" StrokeThickness="3" StrokeStartLineCap="Round" StrokeEndLineCap="Round"/>
                        <Ellipse x:Name="circle" Fill="Transparent" Stroke="White" StrokeThickness="3" Width="64" Height="64"/>
                    </Canvas>

                </Grid>
            </ScrollViewer>
        </Border>

    </DockPanel>


</Window>
下記の MainWindow.xaml.cs において
using System.Runtime.InteropServices; をお忘れなく。
using System.Windows.Media.Imaging; をお忘れなく。
using System;
using System.Collections.Generic;
using System.Linq;
using System.Text;
using System.Threading.Tasks;
using System.Windows;
using System.Windows.Controls;
using System.Windows.Data;
using System.Windows.Documents;
using System.Windows.Input;
using System.Windows.Navigation;
using System.Windows.Shapes;
using System.Windows.Media;

// これの追加を忘れないように. Don't forget tot add this sentence.
using System.Runtime.InteropServices;
using System.Windows.Media.Imaging;

namespace aaa
{

	public partial class MainWindow : Window
	{

		// 32bitsパックの構造体を定義する.
		[StructLayout( LayoutKind.Explicit)]
		public struct GY_IMG_BPP32
		{
			[FieldOffset(0)] public byte B;
			[FieldOffset(1)] public byte G;
			[FieldOffset(2)] public byte R;
			[FieldOffset(3)] public byte A;
		}

		const int INI_W = 640;
		const int INI_H = 480;

		const double DPI_X = 96.0;
		const double DPI_Y = 96.0;

		GY_IMG_BPP32 [] Data000;
		WriteableBitmap Bmp000;

		int TheX = 0;
		int TheY = 0;

		// グラデーションデータを格納する.
		bool get_grad_data( GY_IMG_BPP32 [] data, int width, int height )
		{

			int w = width;
			int h = height;

			// 2ビットシフトで四分のイチ.
			int qtr_w = w >> 2;

			int xs0 = qtr_w * 0;
			int xs1 = qtr_w * 1;
			int xs2 = qtr_w * 2;
			int xs3 = qtr_w * 3;

			int xe0 = (( xs0 + qtr_w ) - 1 );
			int xe1 = (( xs1 + qtr_w ) - 1 );
			int xe2 = (( xs2 + qtr_w ) - 1 );
			int xe3 = (( xs3 + qtr_w ) - 1 );

			// 透明度は不透明とする.
			const byte LEVEL_ALPHA = 0xff;

			// グラデーションを格納する.
			for ( int j = 0; j < h; j++ )
			{

				double rate = (double)(j)/(double)( h - 1 );
				byte level = (byte)( Math.Round( rate * 255.0 ));

				int adrs = w * j;

				// Gray のグラデーション.
				for ( int i = xs0; i <= xe0; i++ )
				{
					data[ adrs ].B = level;
					data[ adrs ].G = level;
					data[ adrs ].R = level;
					data[ adrs ].A = LEVEL_ALPHA;
					adrs++;
				}

				// Blue のグラデーション.
				for ( int i = xs1; i <= xe1; i++ )
				{
					data[ adrs ].B = level;
					data[ adrs ].G = 0x00;
					data[ adrs ].R = 0x00;
					data[ adrs ].A = LEVEL_ALPHA;
					adrs++;
				}

				// Green のグラデーション.
				for ( int i = xs2; i <= xe2; i++ )
				{
					data[ adrs ].B = 0x00;
					data[ adrs ].G = level;
					data[ adrs ].R = 0x00;
					data[ adrs ].A = LEVEL_ALPHA;
					adrs++;
				}

				// Red のグラデーション.
				for ( int i = xs3; i <= xe3; i++ )
				{
					data[ adrs ].B = 0x00;
					data[ adrs ].G = 0x00;
					data[ adrs ].R = level;
					data[ adrs ].A = LEVEL_ALPHA;
					adrs++;
				}

			}

			return true;

		}

		//////////////////////////////////////////////////////////
		//////////////////////////////////////////////////////////
		//////////////////////////////////////////////////////////

		public MainWindow()
		{

			InitializeComponent();

			int w = INI_W;
			int h = INI_H;
			int numpix = w * h;
			Data000 = new GY_IMG_BPP32[ numpix ];

			// グラデーションデータを取得する.
			get_grad_data( Data000, w, h );

			// 32bppのビットマップを生成する.
			PixelFormat pixfmt = PixelFormats.Bgra32;
			BitmapPalette palette = null;
			Bmp000 = new WriteableBitmap( w, h, DPI_X, DPI_Y, pixfmt, palette );

			// データを書き込む.
			Int32Rect rct = new Int32Rect( 0, 0, w, h );
			int stride_bytes = w * Marshal.SizeOf( typeof( GY_IMG_BPP32 ));
			int offset = 0;
			Bmp000.WritePixels( rct, Data000, stride_bytes, offset );

			// 画像出力先のサイズを決定する.
			image000.Width = Bmp000.PixelWidth;
			image000.Height = Bmp000.PixelHeight;

			// 画像出力先にビットマップを関係づける.
			image000.Source = Bmp000;

			// 画像の真ん中に十字線を固定表示したい.
			TheX = w >> 1;
			TheY = h >> 1;

		}

		protected override void OnRender( DrawingContext dc )
		{

			// cross_hair_vert は XAML の Canvas の中で定義しておくこと.
			// cross_hair_vert は XAML の Canvas の中で定義しておくこと.
			// circle          は XAML の Canvas の中で定義しておくこと.

			// 出力コントロールのオフセット座標を取得する.
			Point img_point = image000.TranslatePoint( new Point( 0, 0 ), grid000 );
			double plot_offset_x = img_point.X;
			double plot_offset_y = img_point.Y;

			// 出力コントロール上のプロット位置.
			double plot_x = (double)( TheX + plot_offset_x );
			double plot_y = (double)( TheY + plot_offset_y );

			// 出力コントロールのサイズ.
			double img_w = image000.Width;
			double img_h = image000.Height;

			// 水平線を引く.
			cross_hair_vert.X1 = plot_x;
			cross_hair_vert.Y1 = plot_offset_y;
			cross_hair_vert.X2 = plot_x;
			cross_hair_vert.Y2 = plot_offset_y + img_h;

			// 垂直線を引く.
			cross_hair_horz.X1 = plot_offset_x;
			cross_hair_horz.Y1 = plot_y;
			cross_hair_horz.X2 = plot_offset_x + img_w;
			cross_hair_horz.Y2 = plot_y;

			// 真円の半径から描画のための左上隅座標を得る.
			double cir_r = ( circle.Width * 0.5 );
			double plot_cir_left = plot_x - cir_r;
			double plot_cir_top = plot_y - cir_r;

			// 真円を描画する.
			circle.SetValue( Canvas.LeftProperty, plot_cir_left );
			circle.SetValue( Canvas.TopProperty, plot_cir_top );

			// ステータスバーのラベルに座標を表示する.
			String str000 = String.Format( "WH {0}*{1}", INI_W, INI_H );
			String str001 = String.Format( "TheXY({0},{1})", TheX, TheY );
			String str002 = String.Format( "image000 WH {0}*{1}", img_w, img_h );
			String str003 = String.Format( "image000 offset({0:f1},{1:f1})", plot_offset_x, plot_offset_y );
			stbLabel000.Content = str000;
			stbLabel001.Content = str001;
			stbLabel002.Content = str002;
			stbLabel003.Content = str003;

		}

		private void menuApplicationQuit_Click( object sender, RoutedEventArgs e )
		{
			// ウインドウを閉じてアプリケーションを終了する.
			this.Close();
		}

		private void menuDebugExec000_Click( object sender, RoutedEventArgs e )
		{
			// NOP.
		}

		private void menuDebugExec001_Click( object sender, RoutedEventArgs e )
		{
			// NOP.
		}

		private void menuDebugExec002_Click( object sender, RoutedEventArgs e )
		{
			// NOP.
		}

		private void menuDebugExec003_Click( object sender, RoutedEventArgs e )
		{
			// NOP.
		}

	}
}
サンプルソースを用意しました。上記のコードのコピーペーストでうまく動かない場合にご利用ください。
コツとしましては、Image の左上隅(0,0)位置が Grid の(0,0)位置とちがっているので、その座標値を動的に取得しなければなりません。
MainWindow.xaml.cs の174行目にある
Point img_point = image000.TranslatePoint( new Point( 0, 0 ), grid000 );
というところがそれにあたります。親要素の grid000 を基準としたときの image000 の位置オフセット量を取得しています。
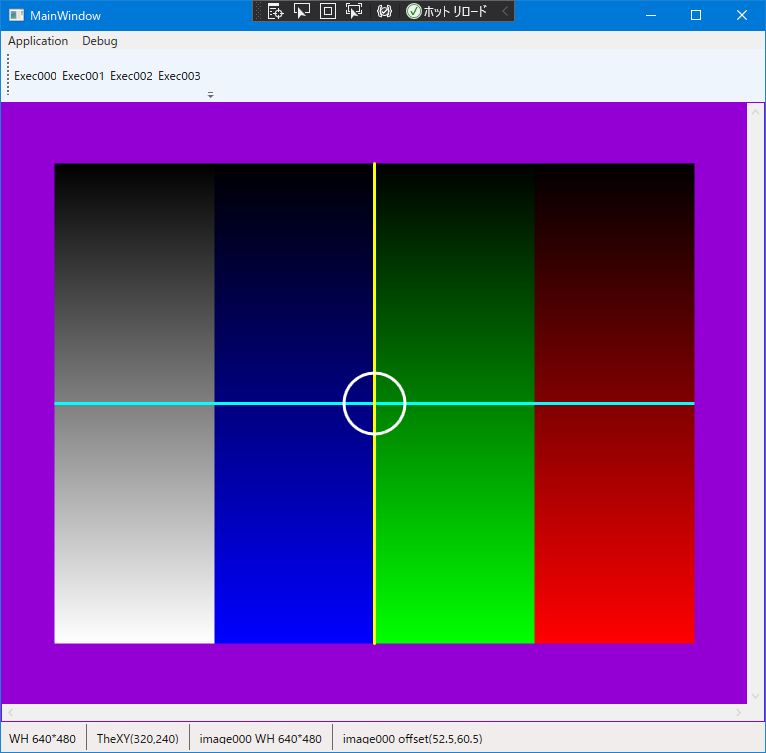
実行すると下記のような感じになります。ウインドウをマウスでリサイズしたり、スクロールバーを動かしたりして、常に画像の中心に十字線と円が描画されていることを確認してください。このとき、ステータスバーの一番右に表示されている image000 のオフセット量にも注目してください。
マウスで十字線の位置を動的に移動したくなりますね。マウスで十字線を動かす方法は下記の記事で紹介しています。
画像をクリックした場所に十字線を描画し濃度レベルを取得する
画像処理ソフトでは必須の機能である、マウスでクリックした場所に十字線を引く方法と、その座標の濃度レベルを取得する方法を紹介します。