画像の等倍表示、フィット表示、フィル表示
画像データの拡大縮小表示をするときは .resizable モディファイアを指定しつつ、.frame モディファイアで画面上の出力サイズを指定します。これについては下記の記事で解説しています。
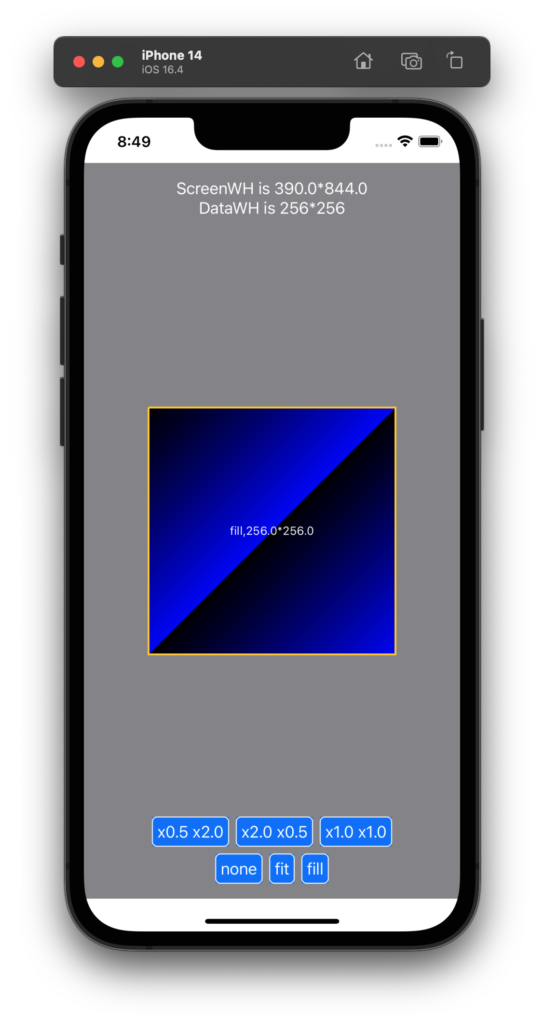
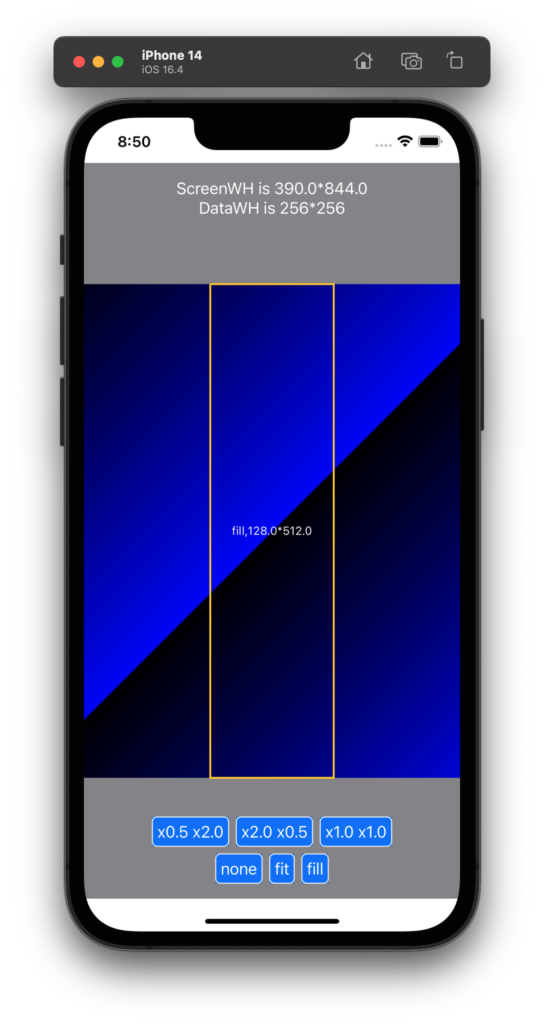
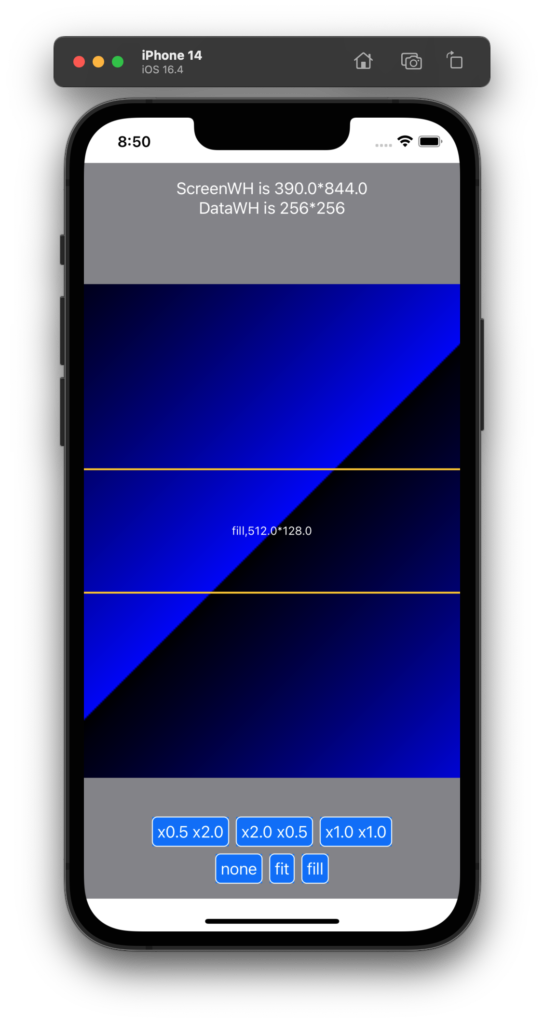
さて、これらのモディファイアと同時に使える .scaledToFit, .scaledToFill というモディファイアがあります。これらの実行結果を下記に示します。
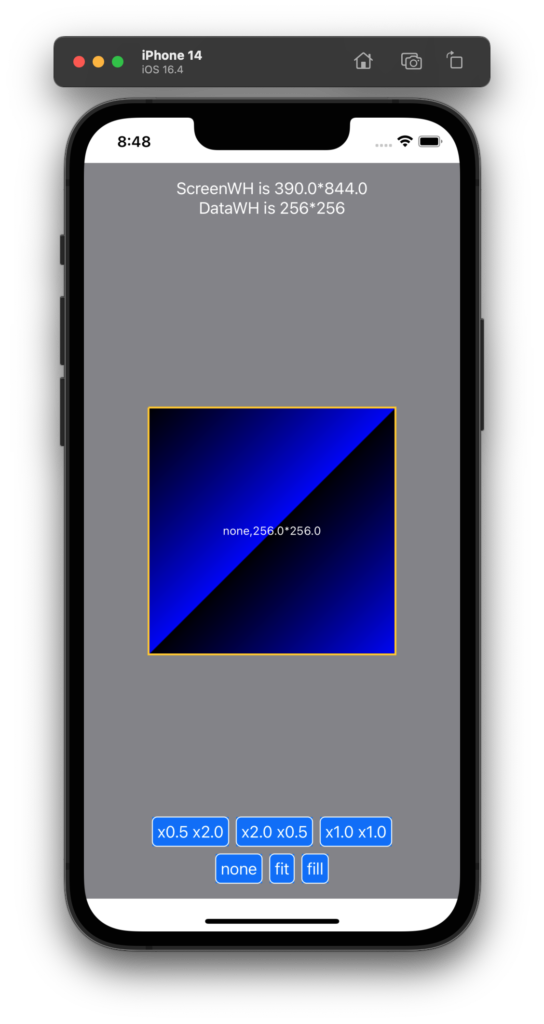
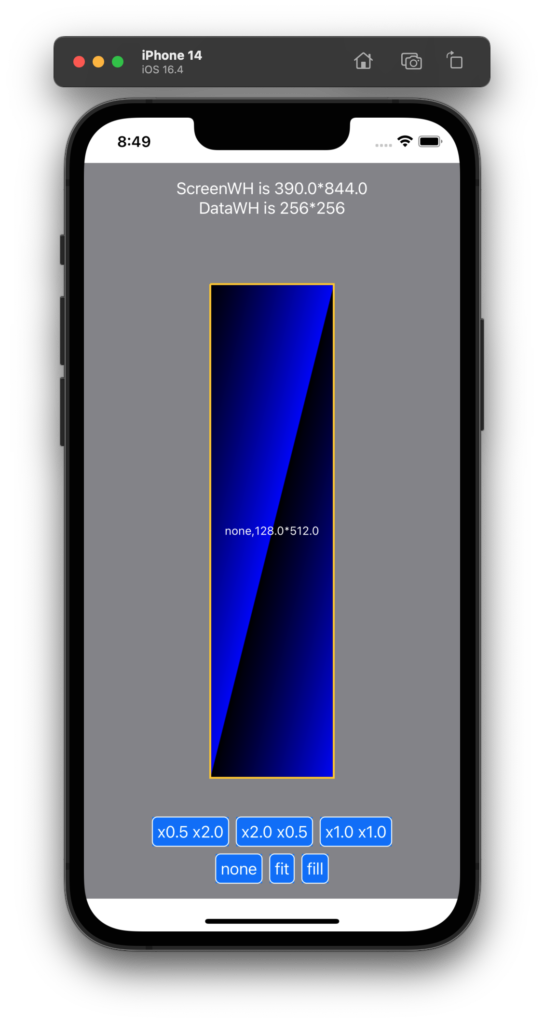
元の画像データのピクセルサイズは 256 * 256 の斜め青グラデーションであり、アスペクト比は 1.0 です。
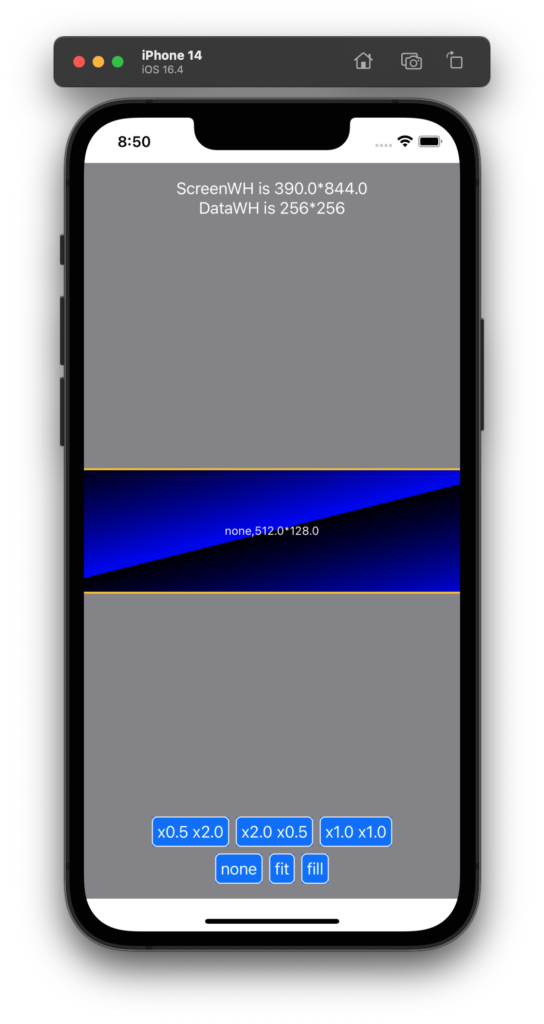
.scaledToFit も .scaledToFill も指定しない場合
.frame() モディファイアの値に従って、それに従って画像が拡大縮小表示されます。アスペクト比は考慮されません。
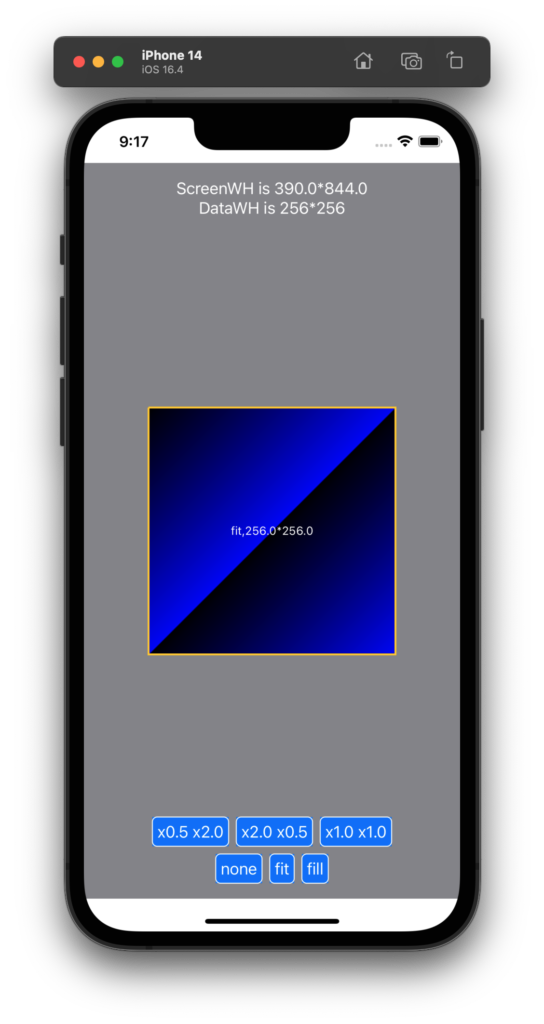
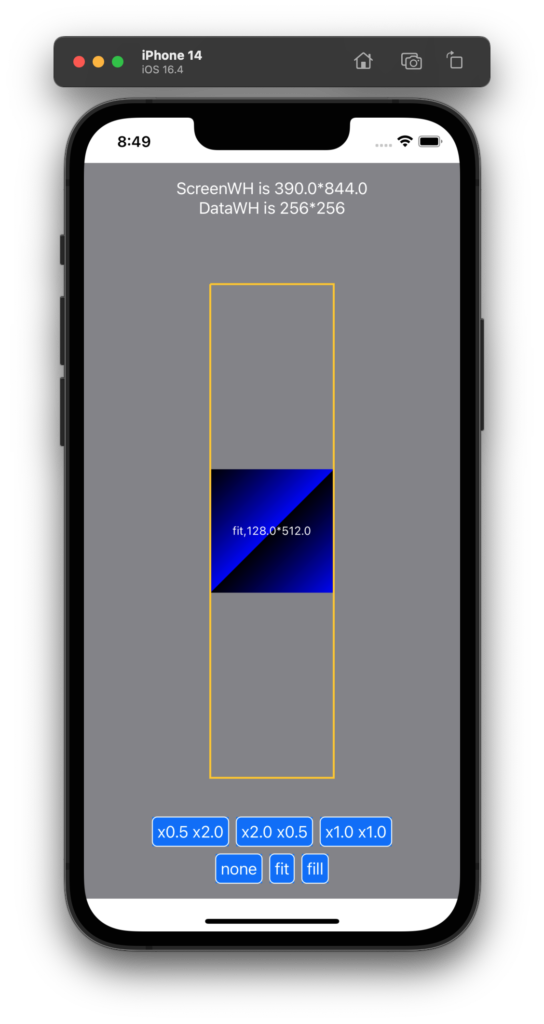
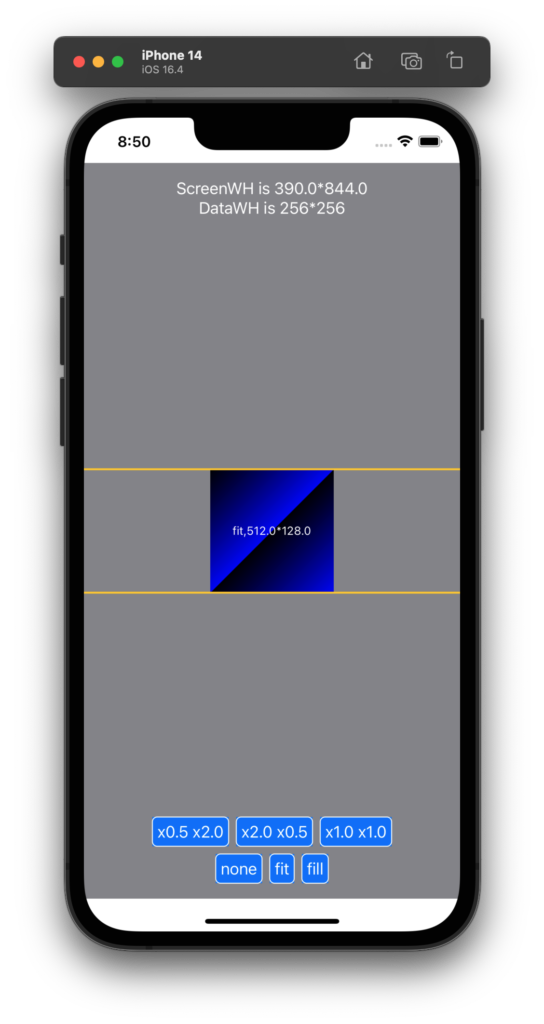
.scaledToFit を指定した場合
.frame() モディファイアで示す枠内に画像アスペクト比を保ちつつ、それに収まるように画像を表示します。
.scaledToFill を指定した場合
.frame() モディファイアには従いますが、画像アスペクト比を保ちつつ、なるべく大きく表示しようとします。
実行コード
以下を実行してもらえば大体の動作がわかりますので簡単な解説にとどめます。
@State な FlagScale という変数を評価して 72〜98行目で、.scaledToFit や .scaledToFill モディファイアを使うかどうか場合わけしています。
FlagScale はボタンを使って変更しています。
画像の表示サイズは 69、70行目で、幅方向と高さ方向、別々に管理して決定しています。この値を .frame モディファイアに渡します。
import SwiftUI

struct STRUCT_RGBA {
    var R: UInt8
    var G: UInt8
    var B: UInt8
    var A: UInt8
}

struct ContentView: View {

    // 画像データ.
    let DATA_W = 256
    let DATA_H = 256
    @State var Buffer: UnsafeMutableRawPointer?
    @State var DataRGBA: UnsafeMutablePointer<STRUCT_RGBA>?

    // 画像データを画面に表示するためのグッズ.
    @State var TheCGContext: CGContext? = nil
    @State var TheUIImage: UIImage? = nil

    // 画面に出力する際の縮尺.
    @State var RateX = 1.0
    @State var RateY = 1.0

    let SCALE_MODE_NONE = 1
    let SCALE_MODE_FIT  = 2
    let SCALE_MODE_FILL = 4

    let STR_SCALE_MODE_NONE = "none"
    let STR_SCALE_MODE_FIT  = "fit"
    let STR_SCALE_MODE_FILL = "fill"

    @State var FlagScale: Int
    @State var StrScaleMode: String

    @State var UiImgW: CGFloat = 0.0
    @State var UiImgH: CGFloat = 0.0

    // ボタン関係の定数.
    let BTN_CORNER_RADIUS = 5.0
    let BTN_STROKE_LINE_WIDTH = 1.0
    let BTN_TXT_PADDING = 5.0
    let BTN_COLOR_FG = Color.white
    let BTN_COLOR_BG = Color.blue
    let BTN_FRAME_COLOR = Color.white

    // パスによる枠線描画の定数.
    let PATH_LINE_COLOR = Color.yellow
    let PATH_LINE_WIDTH = 2.0

    // 初期化コード.
    init (){
        FlagScale = SCALE_MODE_NONE
        StrScaleMode = STR_SCALE_MODE_NONE
    }

    var body: some View {

        ZStack{

            // 最背面は背景グレーで塗りつぶす.
            Rectangle()
                .foregroundColor( .gray )

            // 中層面で画像を表示する.
            if let TheUIImageUnwrapped = TheUIImage {

                let ui_img_w = CGFloat( DATA_W ) * RateX
                let ui_img_h = CGFloat( DATA_H ) * RateY

                if FlagScale == SCALE_MODE_NONE {
                    // 等倍描画する.
                    Image( uiImage: TheUIImageUnwrapped )
                        .resizable()
                        .frame( width: ui_img_w, height: ui_img_h )
                }
                else if FlagScale == SCALE_MODE_FIT {
                    // フィット描画する.
                    Image( uiImage: TheUIImageUnwrapped )
                        .resizable()
                        .scaledToFit()
                        .frame( width: ui_img_w, height: ui_img_h )
                }
                else if FlagScale == SCALE_MODE_FILL {
                    // フィル描画する.
                    Image( uiImage: TheUIImageUnwrapped )
                        .resizable()
                        .scaledToFill()
                        .frame( width: ui_img_w, height: ui_img_h )
                }
                else
                {
                    // 等倍描画する.
                    Image( uiImage: TheUIImageUnwrapped )
                        .resizable()
                        .frame( width: ui_img_w, height: ui_img_h )
                }

                // 画像を囲む枠線を描画する.
                Path{
                    path in

                    let xs = 0.0
                    let ys = 0.0
                    let xe = ui_img_w
                    let ye = ui_img_h

                    let pnt0 = CGPoint( x: xs, y: ys )
                    let pnt1 = CGPoint( x: xe, y: ys )
                    let pnt2 = CGPoint( x: xe, y: ye )
                    let pnt3 = CGPoint( x: xs, y: ye )

                    // 0, 1, 2, 3, 0 で矩形枠線を描画する.
                    path.move( to: pnt0 )
                    path.addLine(to: pnt1 )
                    path.addLine(to: pnt2 )
                    path.addLine(to: pnt3 )
                    path.addLine(to: pnt0 )
                }
                .stroke( PATH_LINE_COLOR, lineWidth: PATH_LINE_WIDTH )
                .frame( width: ui_img_w, height: ui_img_h )

                // 現在の描画モードを表示する.
                Text( String( format: "%@,%.1f*%.1f", StrScaleMode, ui_img_w, ui_img_h ) )
                    .foregroundColor( .white )
                    .font( .system( size: 12.0 ) )

            }
            else
            {
                // TheUIImage が適切に生成されていなければ何も表示しない.
                Spacer()
            }

            // 最前面の画面上部にデバッグ情報を表示する.
            VStack{

                let scr_w = UIScreen.main.bounds.size.width
                let scr_h = UIScreen.main.bounds.size.height

                Text( String( format: "ScreenWH is %.1f*%.1f", scr_w, scr_h ))
                    .foregroundColor( .white )
                Text( String( format: "DataWH is %d*%d", DATA_W, DATA_H ))
                    .foregroundColor( .white )

            }
            .frame( maxWidth: .infinity, maxHeight: .infinity, alignment: .top )
            .padding( .top )

            VStack{

                HStack{

                    // 描画サイズ変更リクエストボタン.
                    Button( action : {
                        RateX = 0.5
                        RateY = 2.0
                    }) {
                        Text( "x0.5 x2.0" )
                            .padding( BTN_TXT_PADDING )
                            .foregroundColor( BTN_COLOR_FG )
                            .background( BTN_COLOR_BG )
                    }
                    .overlay(
                        RoundedRectangle( cornerRadius: BTN_CORNER_RADIUS )
                            .stroke( BTN_FRAME_COLOR, lineWidth: BTN_STROKE_LINE_WIDTH )
                    )

                    // 描画サイズ変更リクエストボタン.
                    Button( action : {
                        RateX = 2.0
                        RateY = 0.5
                    }) {
                        Text( "x2.0 x0.5" )
                            .padding( BTN_TXT_PADDING )
                            .foregroundColor( BTN_COLOR_FG )
                            .background( BTN_COLOR_BG )
                    }
                    .overlay(
                        RoundedRectangle( cornerRadius: BTN_CORNER_RADIUS )
                            .stroke( BTN_FRAME_COLOR, lineWidth: BTN_STROKE_LINE_WIDTH )
                    )

                    // 描画サイズ変更リクエストボタン.
                    Button( action : {
                        RateX = 1.0
                        RateY = 1.0
                    }) {
                        Text( "x1.0 x1.0" )
                            .padding( BTN_TXT_PADDING )
                            .foregroundColor( BTN_COLOR_FG )
                            .background( BTN_COLOR_BG )
                    }
                    .overlay(
                        RoundedRectangle( cornerRadius: BTN_CORNER_RADIUS )
                            .stroke( BTN_FRAME_COLOR, lineWidth: BTN_STROKE_LINE_WIDTH )
                    )

                }

                HStack{

                    // 等倍描画リクエストボタン.
                    Button( action : {
                        FlagScale = SCALE_MODE_NONE
                        StrScaleMode = STR_SCALE_MODE_NONE
                    }) {
                        Text( STR_SCALE_MODE_NONE )
                            .padding( BTN_TXT_PADDING )
                            .foregroundColor( BTN_COLOR_FG )
                            .background( BTN_COLOR_BG )
                    }
                    .overlay(
                        RoundedRectangle( cornerRadius: BTN_CORNER_RADIUS )
                            .stroke( BTN_FRAME_COLOR, lineWidth: BTN_STROKE_LINE_WIDTH )
                    )

                    // フィット描画リクエストボタン.
                    Button( action : {
                        FlagScale = SCALE_MODE_FIT
                        StrScaleMode = STR_SCALE_MODE_FIT
                    }) {
                        Text( STR_SCALE_MODE_FIT )
                            .padding( BTN_TXT_PADDING )
                            .foregroundColor( BTN_COLOR_FG )
                            .background( BTN_COLOR_BG )
                    }
                    .overlay(
                        RoundedRectangle( cornerRadius: BTN_CORNER_RADIUS )
                            .stroke( BTN_FRAME_COLOR, lineWidth: BTN_STROKE_LINE_WIDTH )
                    )

                    // フィル描画リクエストボタン.
                    Button( action : {
                        FlagScale = SCALE_MODE_FILL
                        StrScaleMode = STR_SCALE_MODE_FILL
                    }) {
                        Text( STR_SCALE_MODE_FILL )
                            .padding( BTN_TXT_PADDING )
                            .foregroundColor( BTN_COLOR_FG )
                            .background( BTN_COLOR_BG )
                    }
                    .overlay(
                        RoundedRectangle( cornerRadius: BTN_CORNER_RADIUS )
                            .stroke( BTN_FRAME_COLOR, lineWidth: BTN_STROKE_LINE_WIDTH )
                    )

                }

            }
            .frame( maxWidth: .infinity, maxHeight: .infinity, alignment: .bottom )
            .padding( .bottom )

        } // ZStack end.
        .onAppear{

            // メモリを確保する.
            let numpix = DATA_W * DATA_H
            let size = MemoryLayout<STRUCT_RGBA>.stride * numpix
            let align = MemoryLayout<STRUCT_RGBA>.alignment
            Buffer = UnsafeMutableRawPointer.allocate( byteCount: size, alignment: align )

            // 連続メモリをRGBAの構造体の並びとして解釈する.
            DataRGBA = Buffer?.bindMemory( to: STRUCT_RGBA.self, capacity: numpix )

            // 確保したメモリに、ななめグラデーションデータを仕込む.
            SetGradDataRGBA( DataRGBA!, DATA_W, DATA_H )

            let one_scan_bytes = DATA_W * 4

            // ビットマップコンテキストを作成する.
            TheCGContext = CGContext(
                data: DataRGBA, // ここは data: Buffer, としても同じ動作になる.
                width: DATA_W,
                height: DATA_H,
                bitsPerComponent: 8,
                bytesPerRow: one_scan_bytes,
                space: CGColorSpaceCreateDeviceRGB(),
                bitmapInfo: CGImageAlphaInfo.premultipliedLast.rawValue
            )

            if TheCGContext != nil
            {
                let the_cgimage = TheCGContext!.makeImage()
                if let the_cgimage = the_cgimage
                {
                    TheUIImage = UIImage( cgImage: the_cgimage )
                }
                else
                {
                    // デバッグコンソールに出力する.
                    print( "the_cgimage is nil.")
                }
            }
            else
            {
                // デバッグコンソールに出力する.
                print( "the_cgcontext is nil." )
            }

        }
        .onDisappear {
            // メモリを破棄する.
            Buffer?.deallocate()
        }

    } // some View end.

    // 画像にデータを仕込むメソッド.
    func SetGradDataRGBA(
            _ data: UnsafeMutablePointer<STRUCT_RGBA>,
            _ width: Int,
            _ height: Int
            )->Void {

        let w = width
        let h = height

        var value: UInt8 = 0

        for j in 0 ..< h{
            var adrs = w * j
            for i in 0 ..< w{
                let tmp = i + j
                value = UInt8( tmp % 256 )
                data[ adrs ].R = 0x00;  // R
                data[ adrs ].G = 0x00;  // G
                data[ adrs ].B = value; // B
                data[ adrs ].A = 0xff;  // A
                adrs += 1
            }
        }

        return

    }

}

struct ContentView_Previews: PreviewProvider {
    static var previews: some View {
        ContentView()
    }
}
おなじような機能のボタンを並べて書くことに抵抗があるようでしたら、下記の記事がボタンのコードをまとめる参考になるはずです。
