32bitsデータを WriteableBitmap に書き込む
32ビット画像データをウインドウに表示するには WriteableBitmap を使うのが簡単で高速です。これ以外の方法もあるのでしょうが、私はおすすめできません。
下記にコードを示します。1画素に Blueに8bits、Greenに8bits、Redに8bits、透明度Alphaに8bitsを割り当てています。それを連続した BGRA, BGRA, BGRA.... をbyte[] で表現したコードです。
下記の名前空間の追加をお忘れなく。
using System.Windows.Media;
using System.Windows.Media.Imaging;
using System;
using System.Collections.Generic;
using System.Linq;
using System.Text;
using System.Threading.Tasks;
using System.Windows;
using System.Windows.Controls;
using System.Windows.Data;
using System.Windows.Documents;
using System.Windows.Input;
using System.Windows.Navigation;
using System.Windows.Shapes;
// この using 追加を忘れずに. Don't forget to add this sentence.
using System.Windows.Media;
using System.Windows.Media.Imaging;
namespace aaa
{
public partial class MainWindow : Window
{
const int INI_W = 512;
const int INI_H = 256;
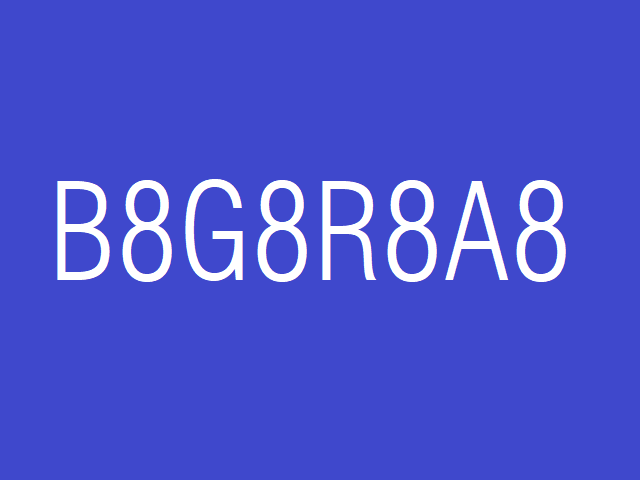
// 表示したいB8G8R8A8の32bitsデータ.
byte [] Data000;
// 表示したい32bitsデータを内包させるビットマップ.
WriteableBitmap Bmp000;
public MainWindow()
{
InitializeComponent();
}
private void menuDebugExec000_Click( object sender, RoutedEventArgs e )
{
// 一画素 BGRA で4バイト.
const int ONEPIX_BYTES_BGRA = 4;
// データ領域を確保する.
int w = INI_W;
int h = INI_H;
int numpix = w * h;
int alloc_bytes = numpix * ONEPIX_BYTES_BGRA;
Data000 = new byte[ alloc_bytes ];
int tmp_w = w >> 2;
int xs0 = tmp_w * 0;
int xs1 = tmp_w * 1;
int xs2 = tmp_w * 2;
int xs3 = tmp_w * 3;
int xe0 = (( xs0 + tmp_w ) - 1 );
int xe1 = (( xs1 + tmp_w ) - 1 );
int xe2 = (( xs2 + tmp_w ) - 1 );
int xe3 = (( xs3 + tmp_w ) - 1 );
// 透明度.
const byte LEVEL_ALPHA = 0xff;
// BGRAなので、画像幅の4倍がワンスキャンのバイト数(ストライドバイト数)である.
int stride_bytes = w * ONEPIX_BYTES_BGRA * sizeof( byte );
// BGRA画素のアドレススキップ値.
int skip = ONEPIX_BYTES_BGRA;
// グラデーションを格納する.
for ( int j = 0; j < h; j++ )
{
int adrs_b = stride_bytes * j;
int adrs_g = adrs_b + 1;
int adrs_r = adrs_b + 2;
int adrs_a = adrs_b + 3;
byte level = (byte)(j);
// Gray のグラデーション.
for ( int i = xs0; i <= xe0; i++ )
{
Data000[ adrs_b ] = level;
Data000[ adrs_g ] = level;
Data000[ adrs_r ] = level;
Data000[ adrs_a ] = LEVEL_ALPHA;
adrs_b += skip;
adrs_g += skip;
adrs_r += skip;
adrs_a += skip;
}
// Blue のグラデーション.
for ( int i = xs1; i <= xe1; i++ )
{
Data000[ adrs_b ] = level;
Data000[ adrs_g ] = 0x00;
Data000[ adrs_r ] = 0x00;
Data000[ adrs_a ] = LEVEL_ALPHA;
adrs_b += skip;
adrs_g += skip;
adrs_r += skip;
adrs_a += skip;
}
// Green のグラデーション.
for ( int i = xs2; i <= xe2; i++ )
{
Data000[ adrs_b ] = 0x00;
Data000[ adrs_g ] = level;
Data000[ adrs_r ] = 0x00;
Data000[ adrs_a ] = LEVEL_ALPHA;
adrs_b += skip;
adrs_g += skip;
adrs_r += skip;
adrs_a += skip;
}
// Red のグラデーション.
for ( int i = xs3; i <= xe3; i++ )
{
Data000[ adrs_b ] = 0x00;
Data000[ adrs_g ] = 0x00;
Data000[ adrs_r ] = level;
Data000[ adrs_a ] = LEVEL_ALPHA;
adrs_b += skip;
adrs_g += skip;
adrs_r += skip;
adrs_a += skip;
}
}
// ビットマップのDPI、とりあえず 96dpi で決め打ちした.
const double DPI_X = 96.0;
const double DPI_Y = 96.0;
PixelFormat pixfmt = PixelFormats.Bgr32; // Bgra32 ではダメみたい.
BitmapPalette palette = null; // 生のBGRAカラーデータの場合パレットは不要である.
// 書き込み可能なビットマップを作成する.
Bmp000 = new WriteableBitmap( w, h, DPI_X, DPI_Y, pixfmt, palette );
// 書き込み可能ビットマップにデータを仕込む.
// ワンスキャンのバイト数はBGRAなのでピクセル幅の4倍.
Int32Rect rct = new Int32Rect( 0, 0, w, h );
const int OFFSET_BYTES = 0;
Bmp000.WritePixels( rct, Data000, stride_bytes, OFFSET_BYTES );
// 表示させるデータを内包したビットマップをGUI表示する.
image000.Width = w;
image000.Height = h;
image000.Source = Bmp000;
}
}
}
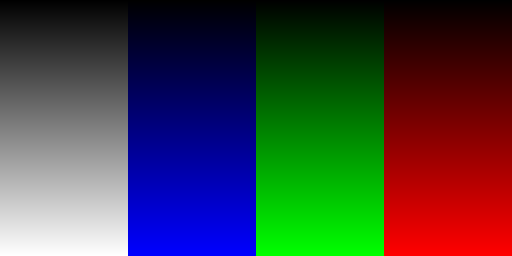
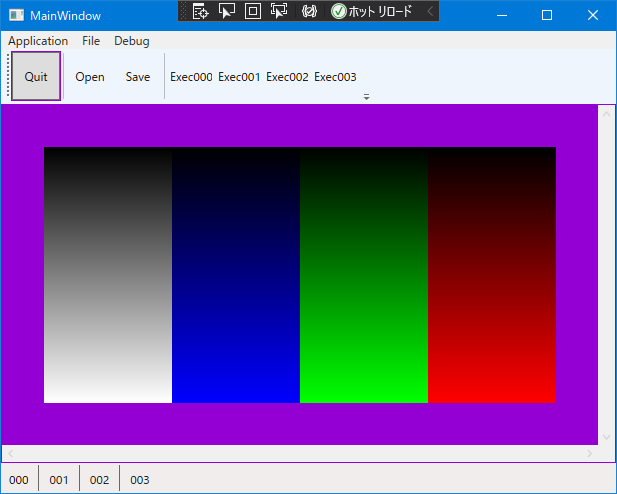
実行結果はこんな感じです。151行目にある WritePixels というメソッド1行だけです。unsafe なども不要です。
上記のコードを見ればわかると思いますが、BGRAを連続した byte[] で扱うにはアドレス演算がめんどうなので、B8G8R8A8の32bitsにパックされた構造体をユーザー定義したほうがいいです。
ユーザ定義でパックされた構造体を定義するには下記の記事を参考にしてください。
24ビットや32ビットでパックされた色画素データ型を定義する
C#でC言語のような typedef struct 構造体定義をする方法を紹介します。この方法を使えばパック構造体も定義できます。
パックされた構造体を要素にもつデータ配列をアクセスするには下記の記事内のソースコードを参考してください。
本記事に紹介したコードは xaml で画像出力コントロールとして image000 が定義されている前提のコードです。下記の記事に示した xaml をご覧ください。
オーソドックスなウインドウスタイルを実現する(非MVVM) | GazoYaro
MFC や WindowsForms で作成したようなオーソドックスな GUI のウインドウを XAML で定義する方法を紹介します。